

Key benefits
- Fully customizable Upsell pages: Built and styled in the same Builder you use for your site and checkout pages, with full control over layout, sections, spacing, and content.
- Reusable across Offers: Create an Upsell once and attach it to multiple Offers. Edits apply everywhere it’s used.
- Built-in analytics: View purchases, conversion rate, and revenue at a glance on the Upsells tab or within each individual Upsell.
How Upsells work
Upsells are created once and reused across your Offers. The same Upsell can serve as either an Upsell or a Downsell, depending on where it appears in your Upsell Funnel. Downsells are not created or managed separately. They are Upsells shown after a previous Upsell is declined.How Upsell Funnels work
After a customer completes a purchase, you can guide them through a series of Upsells. Each step shows an Upsell. If the customer declines, you can optionally add another Upsell as a Downsell before continuing to the next step. The same Upsell can be reused across different funnels, but it can only appear once within a single funnel. Here is an example of a three-step Upsell Funnel with Downsells at each step: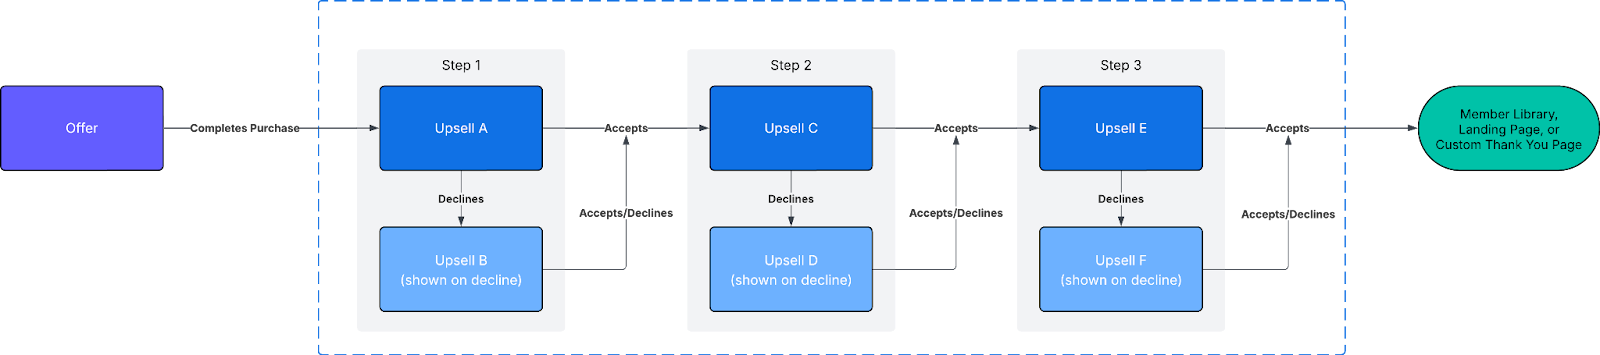
Create an Upsell
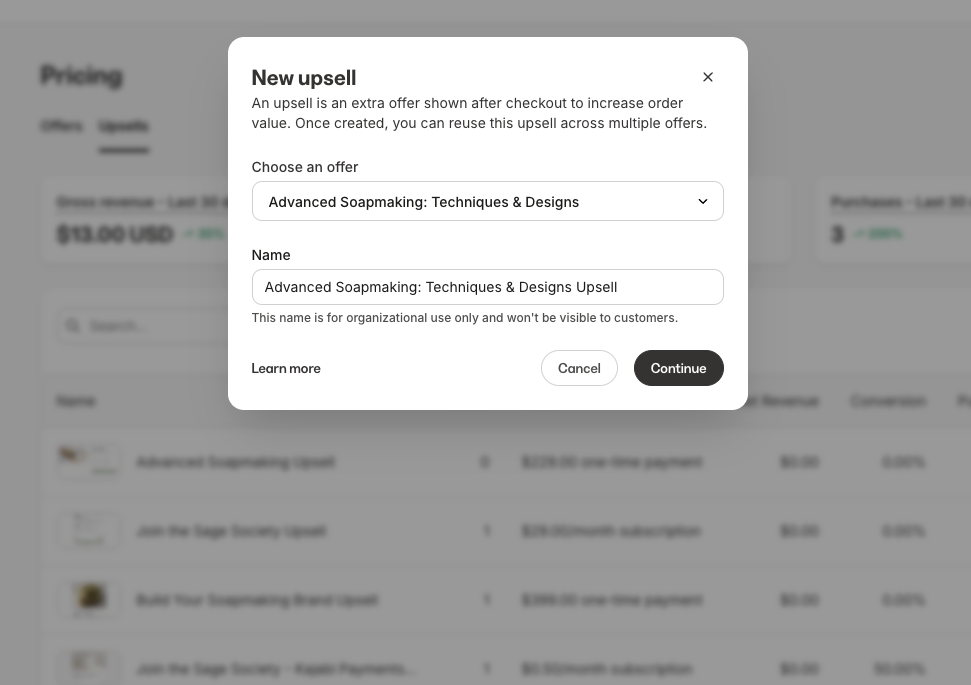
- From the Dashboard, click Sales, then click Pricing.
- Click the Upsells tab.
- Click New Upsell.
- Name your Upsell and configure the pricing details.
- Under the active template, click Customize to edit the page layout, content, and branding in the Builder.
- Save your changes.
Add a discount to an Upsell
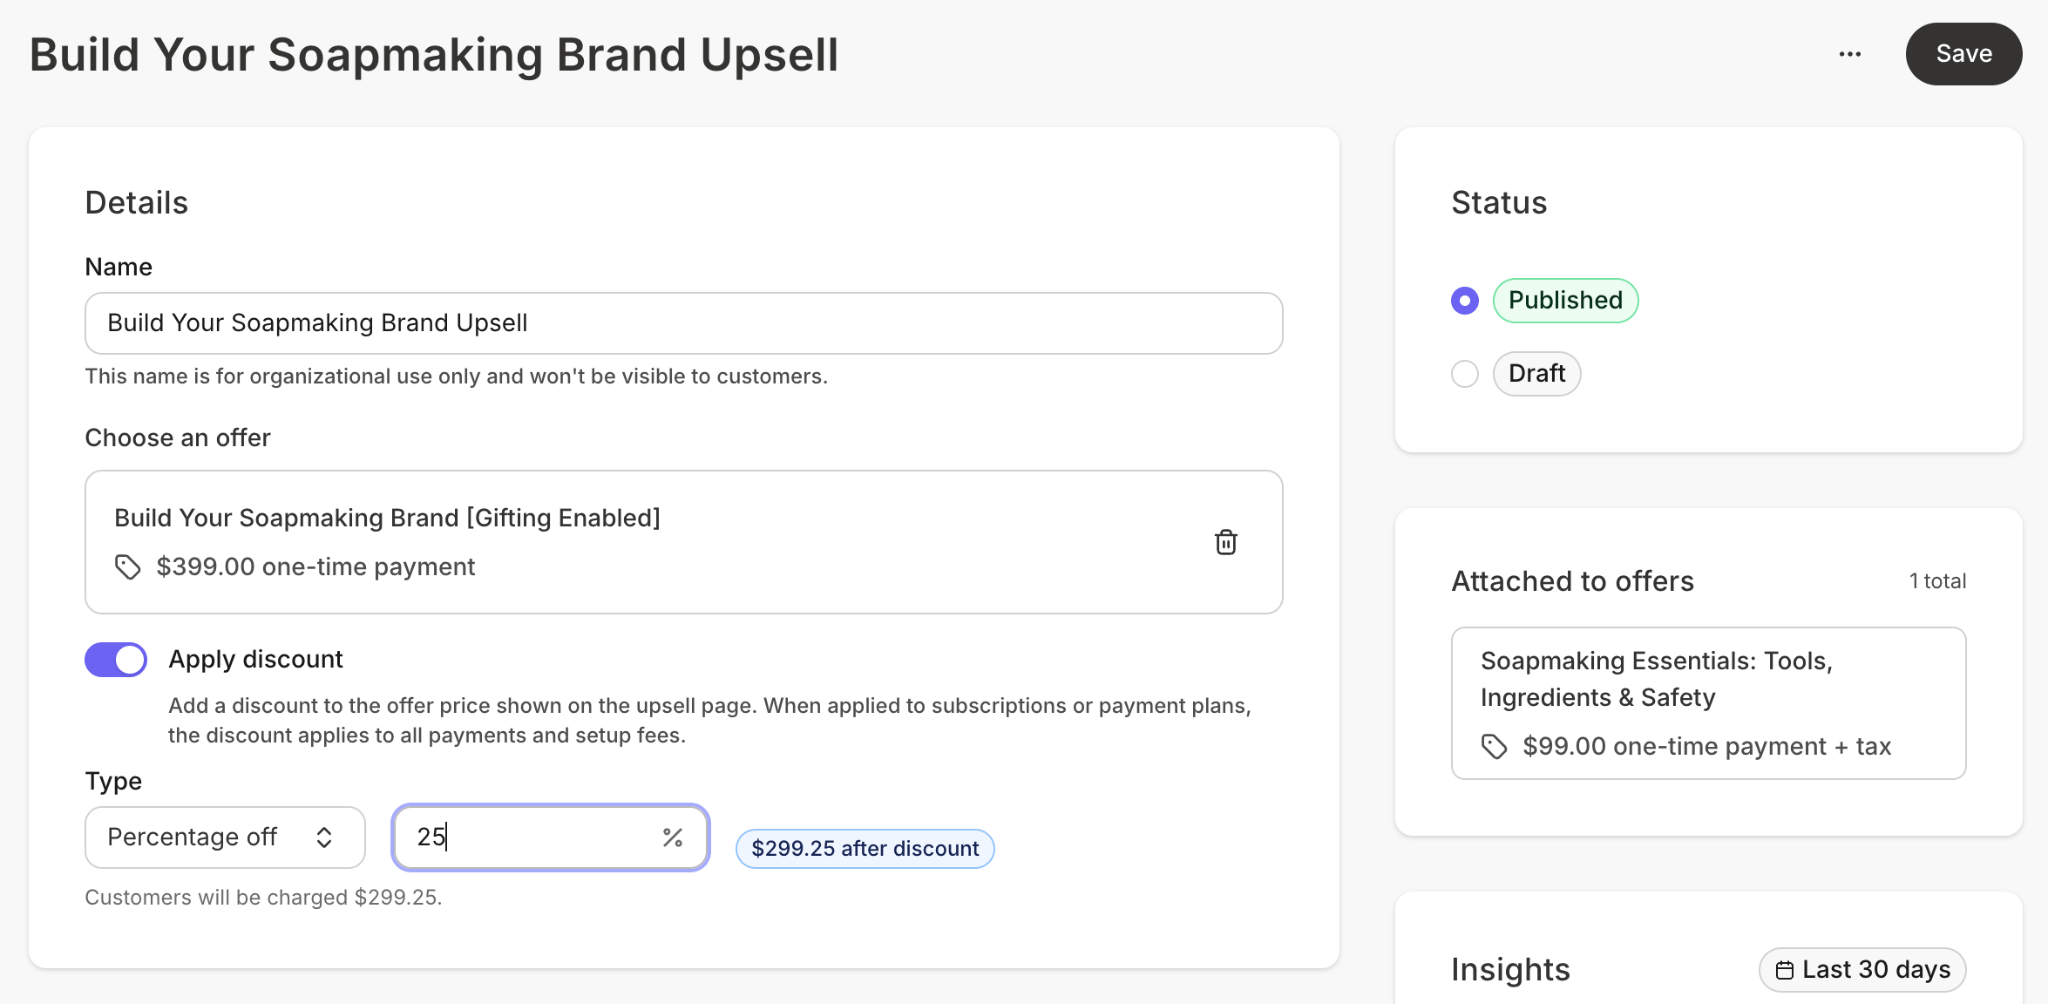
Offer an upsell at a reduced price, without changing the Offer’s regular price anywhere else. The discounted price shows on the Upsell page and is what the customer is charged if they accept. Discounts are added when editing an existing Upsell. If you’re creating a new Upsell, save it first, then reopen it to add a discount.Enable an Upsell discount
- From the Dashboard, click Sales, then click Pricing.
- Click the Upsells tab, then open the Upsell you want to edit.
- In the Details section, confirm an Offer is selected.
- Turn on the Apply discount toggle.
- Enter a Discount percentage between 1 and 99.
- Save your changes.
What customers see
On the Upsell page, the original price appears crossed out, the discounted price shows as the headline, and a badge such as 25% OFF appears next to it. The order summary lists the subtotal, the discount as a credit, and the discounted total due now. On receipts and in purchase history, the saving appears as Discount.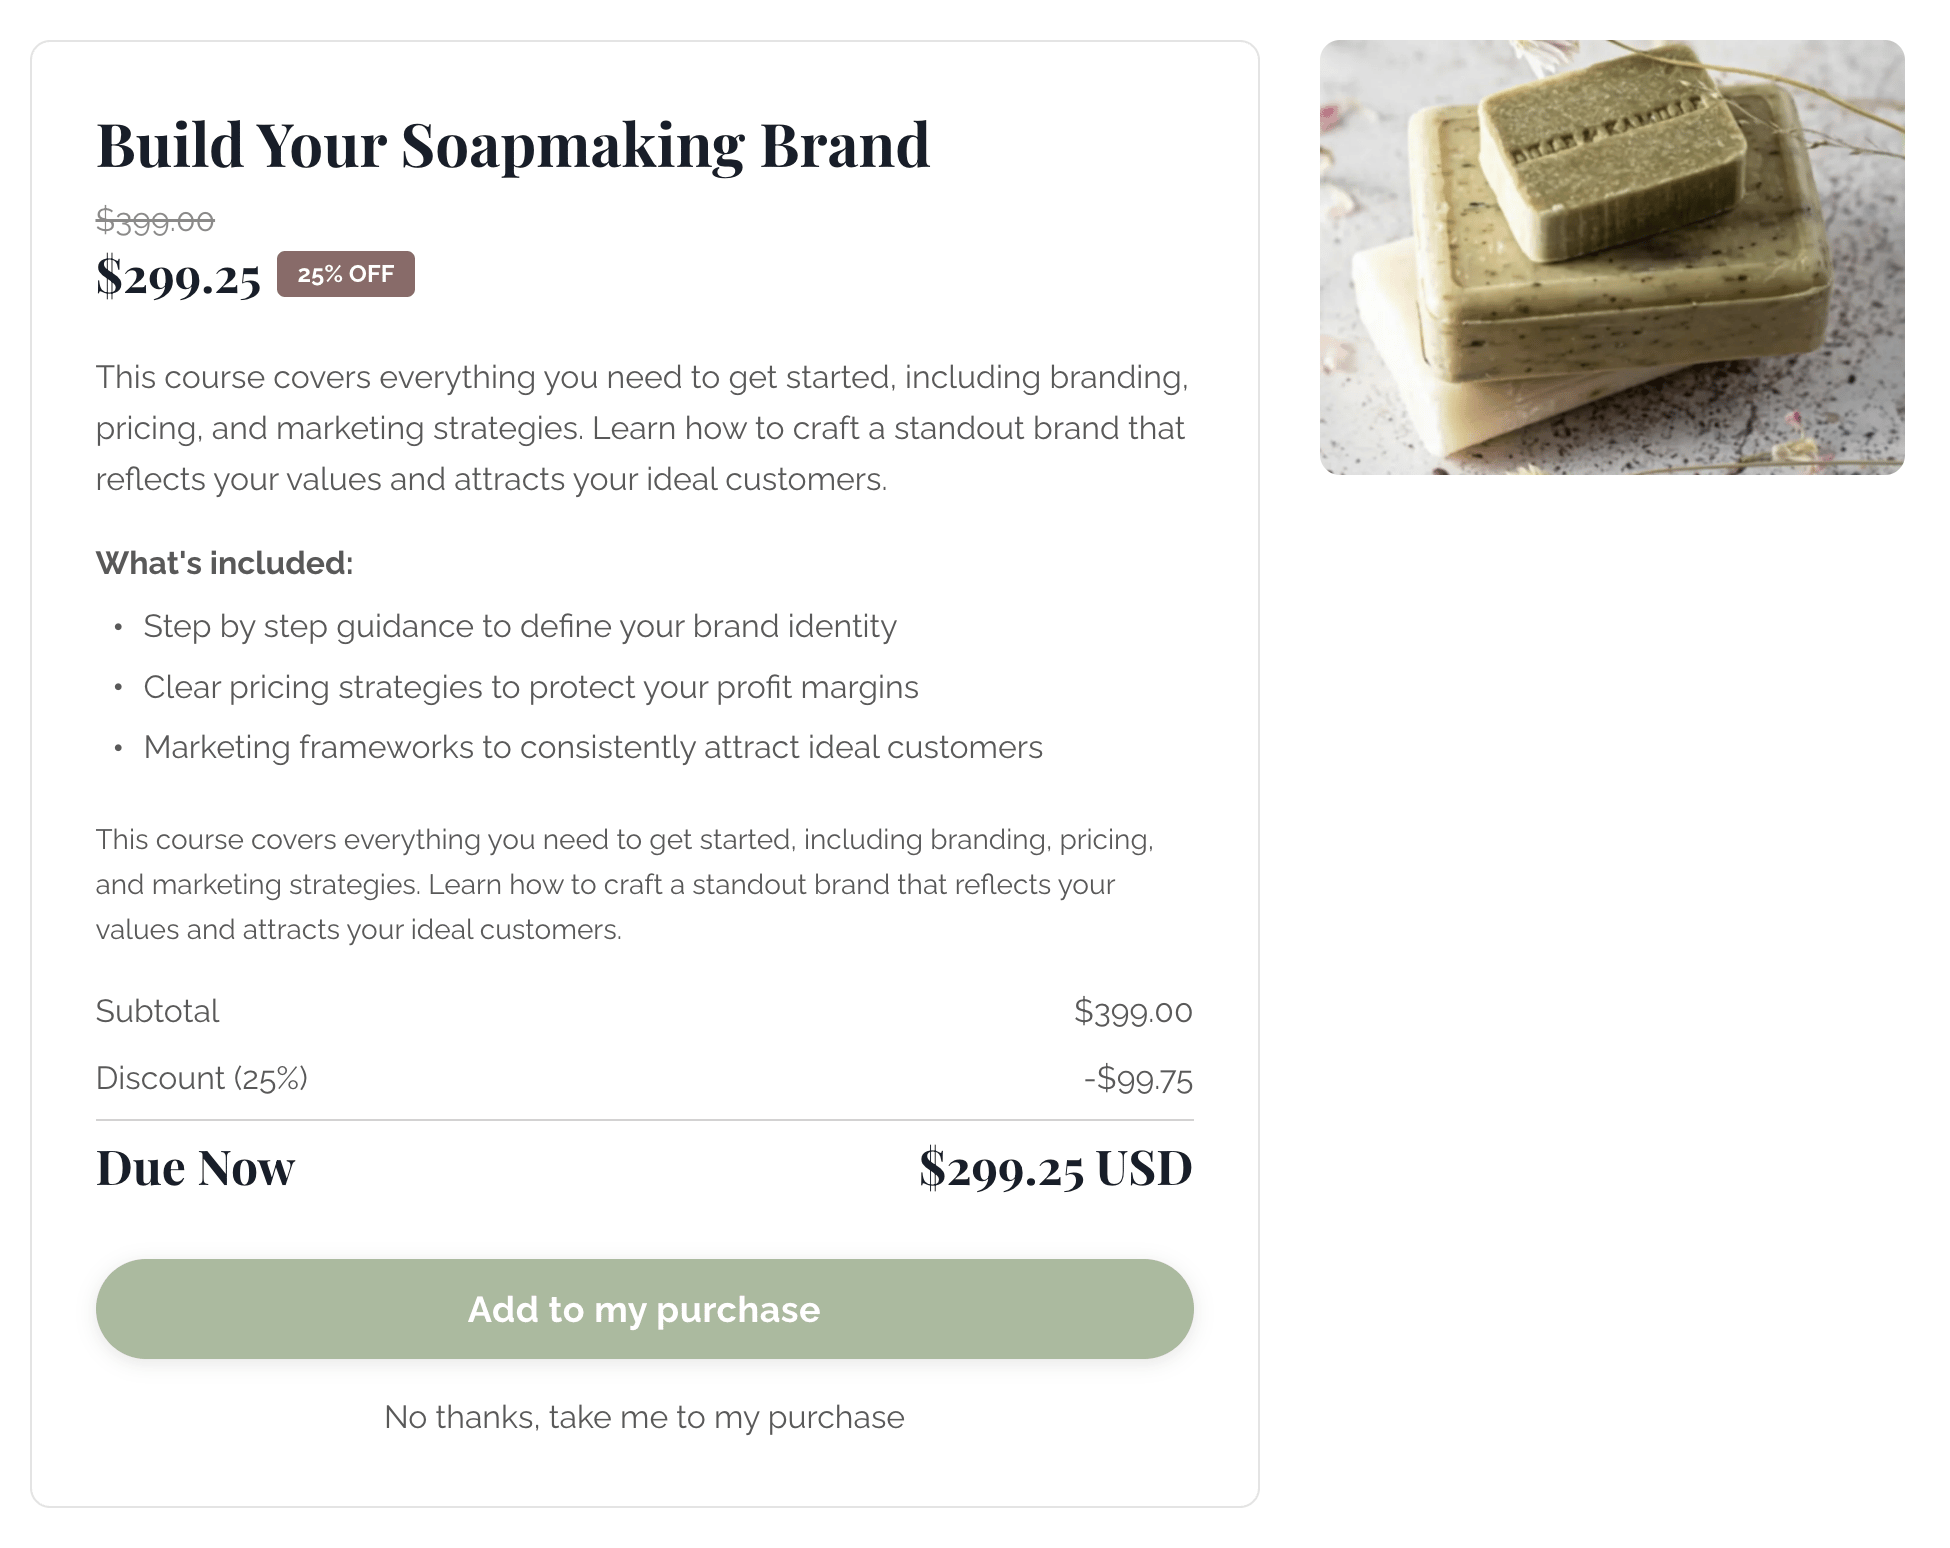
Note: A discount can’t reduce a charge below $0.50.
Customize the discount text
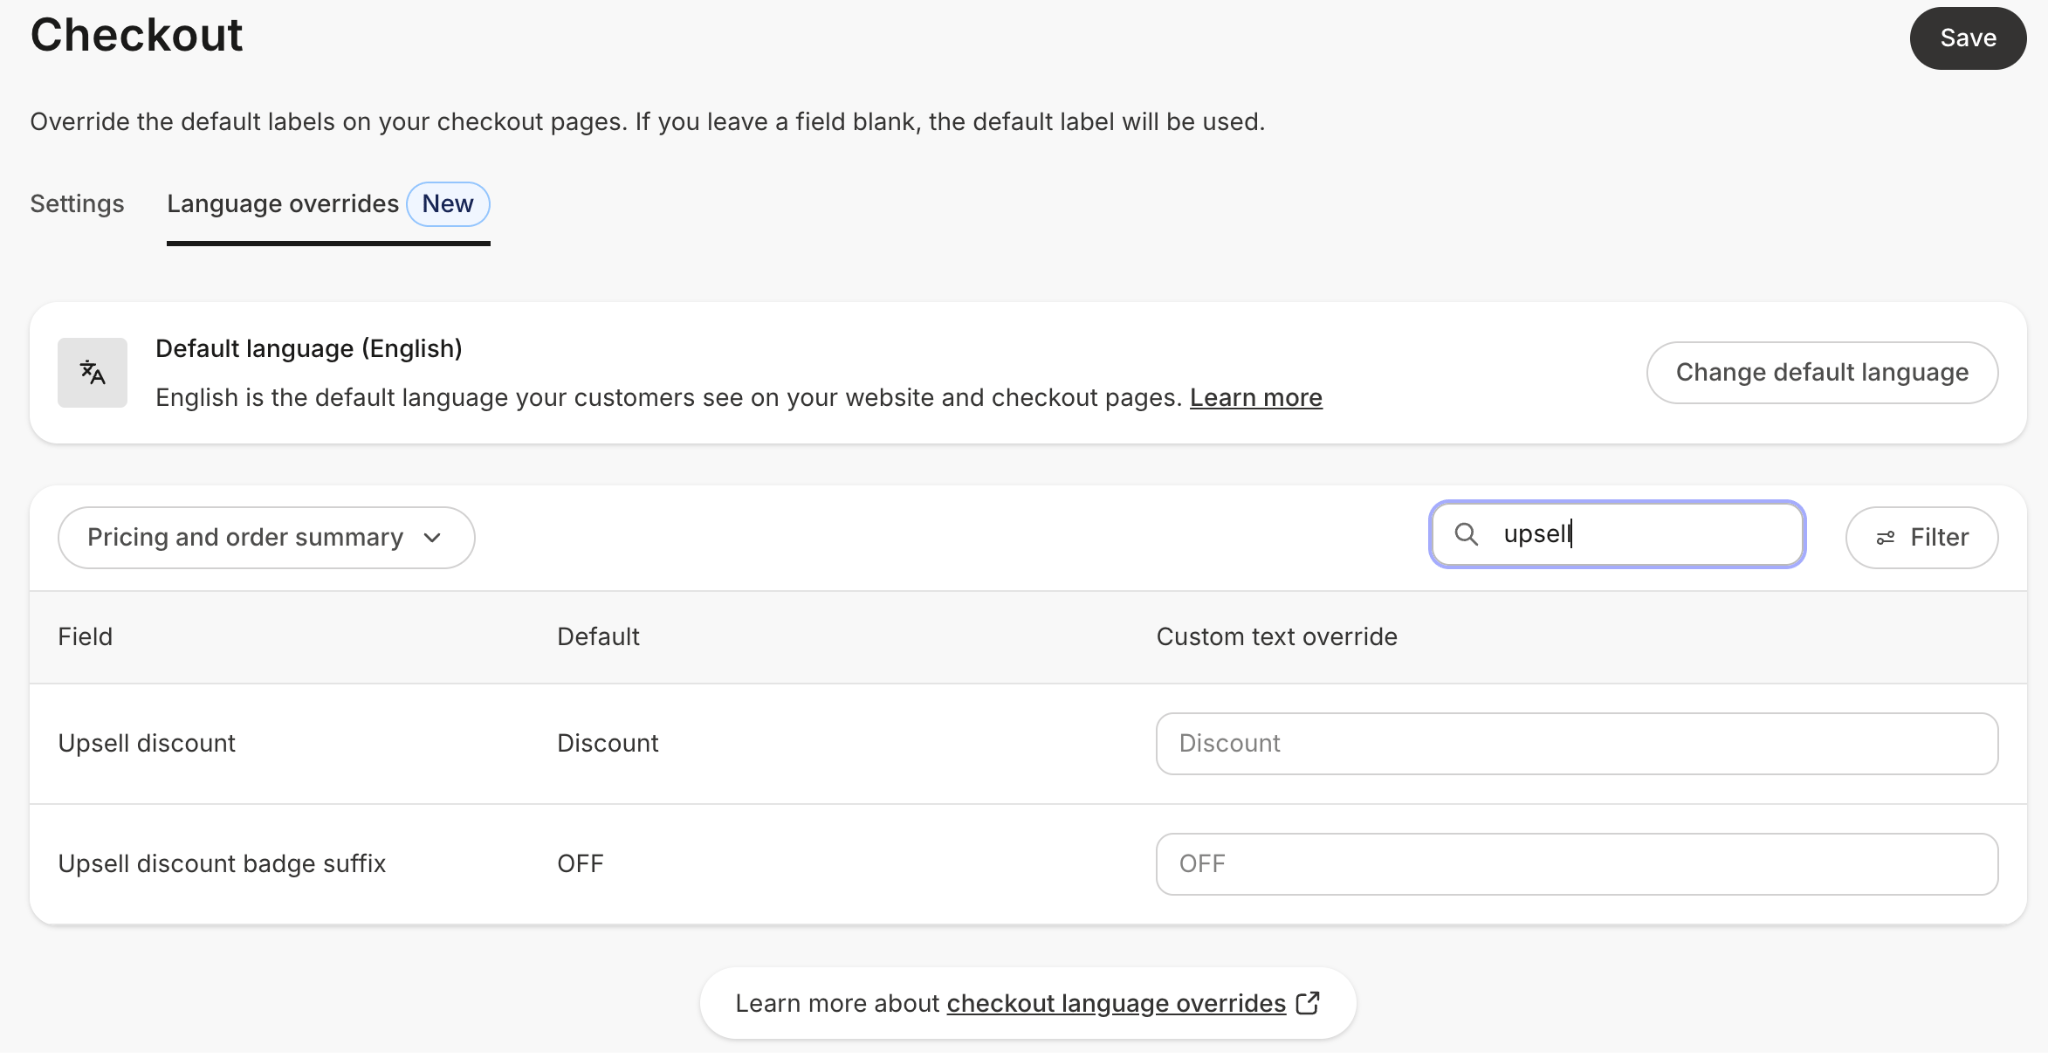
Two pieces of the discount display follow your site’s language settings by default, and you can override either one from your checkout language overrides:- Discount: The label on the discount line in the order summary.
- OFF: The suffix on the badge (for example, 25% OFF).
- From the Dashboard, click Settings, then click Checkout, then click the Language overrides tab.
- Find the Upsell discount field (the order-summary label) or the Upsell discount badge suffix field (the badge suffix).
- Enter your preferred text, or leave it off to use the default.
View Upsells
All of your Upsells are centrally managed from one place:- From the Dashboard, click Sales, then click Pricing.
- Click the Upsells tab.
- Click into an Upsell and review the details.
- Click Preview to see how it appears to customers.

Customize an Upsell page
- From the Dashboard, click Sales, then click Pricing, then click the Upsells tab.
- Open the Upsell you want to customize.
- Under the active template, click Customize.
- Adjust layout, add sections or blocks, and refine branding directly in the Builder.
- Save your changes. Updates apply everywhere this Upsell is used.

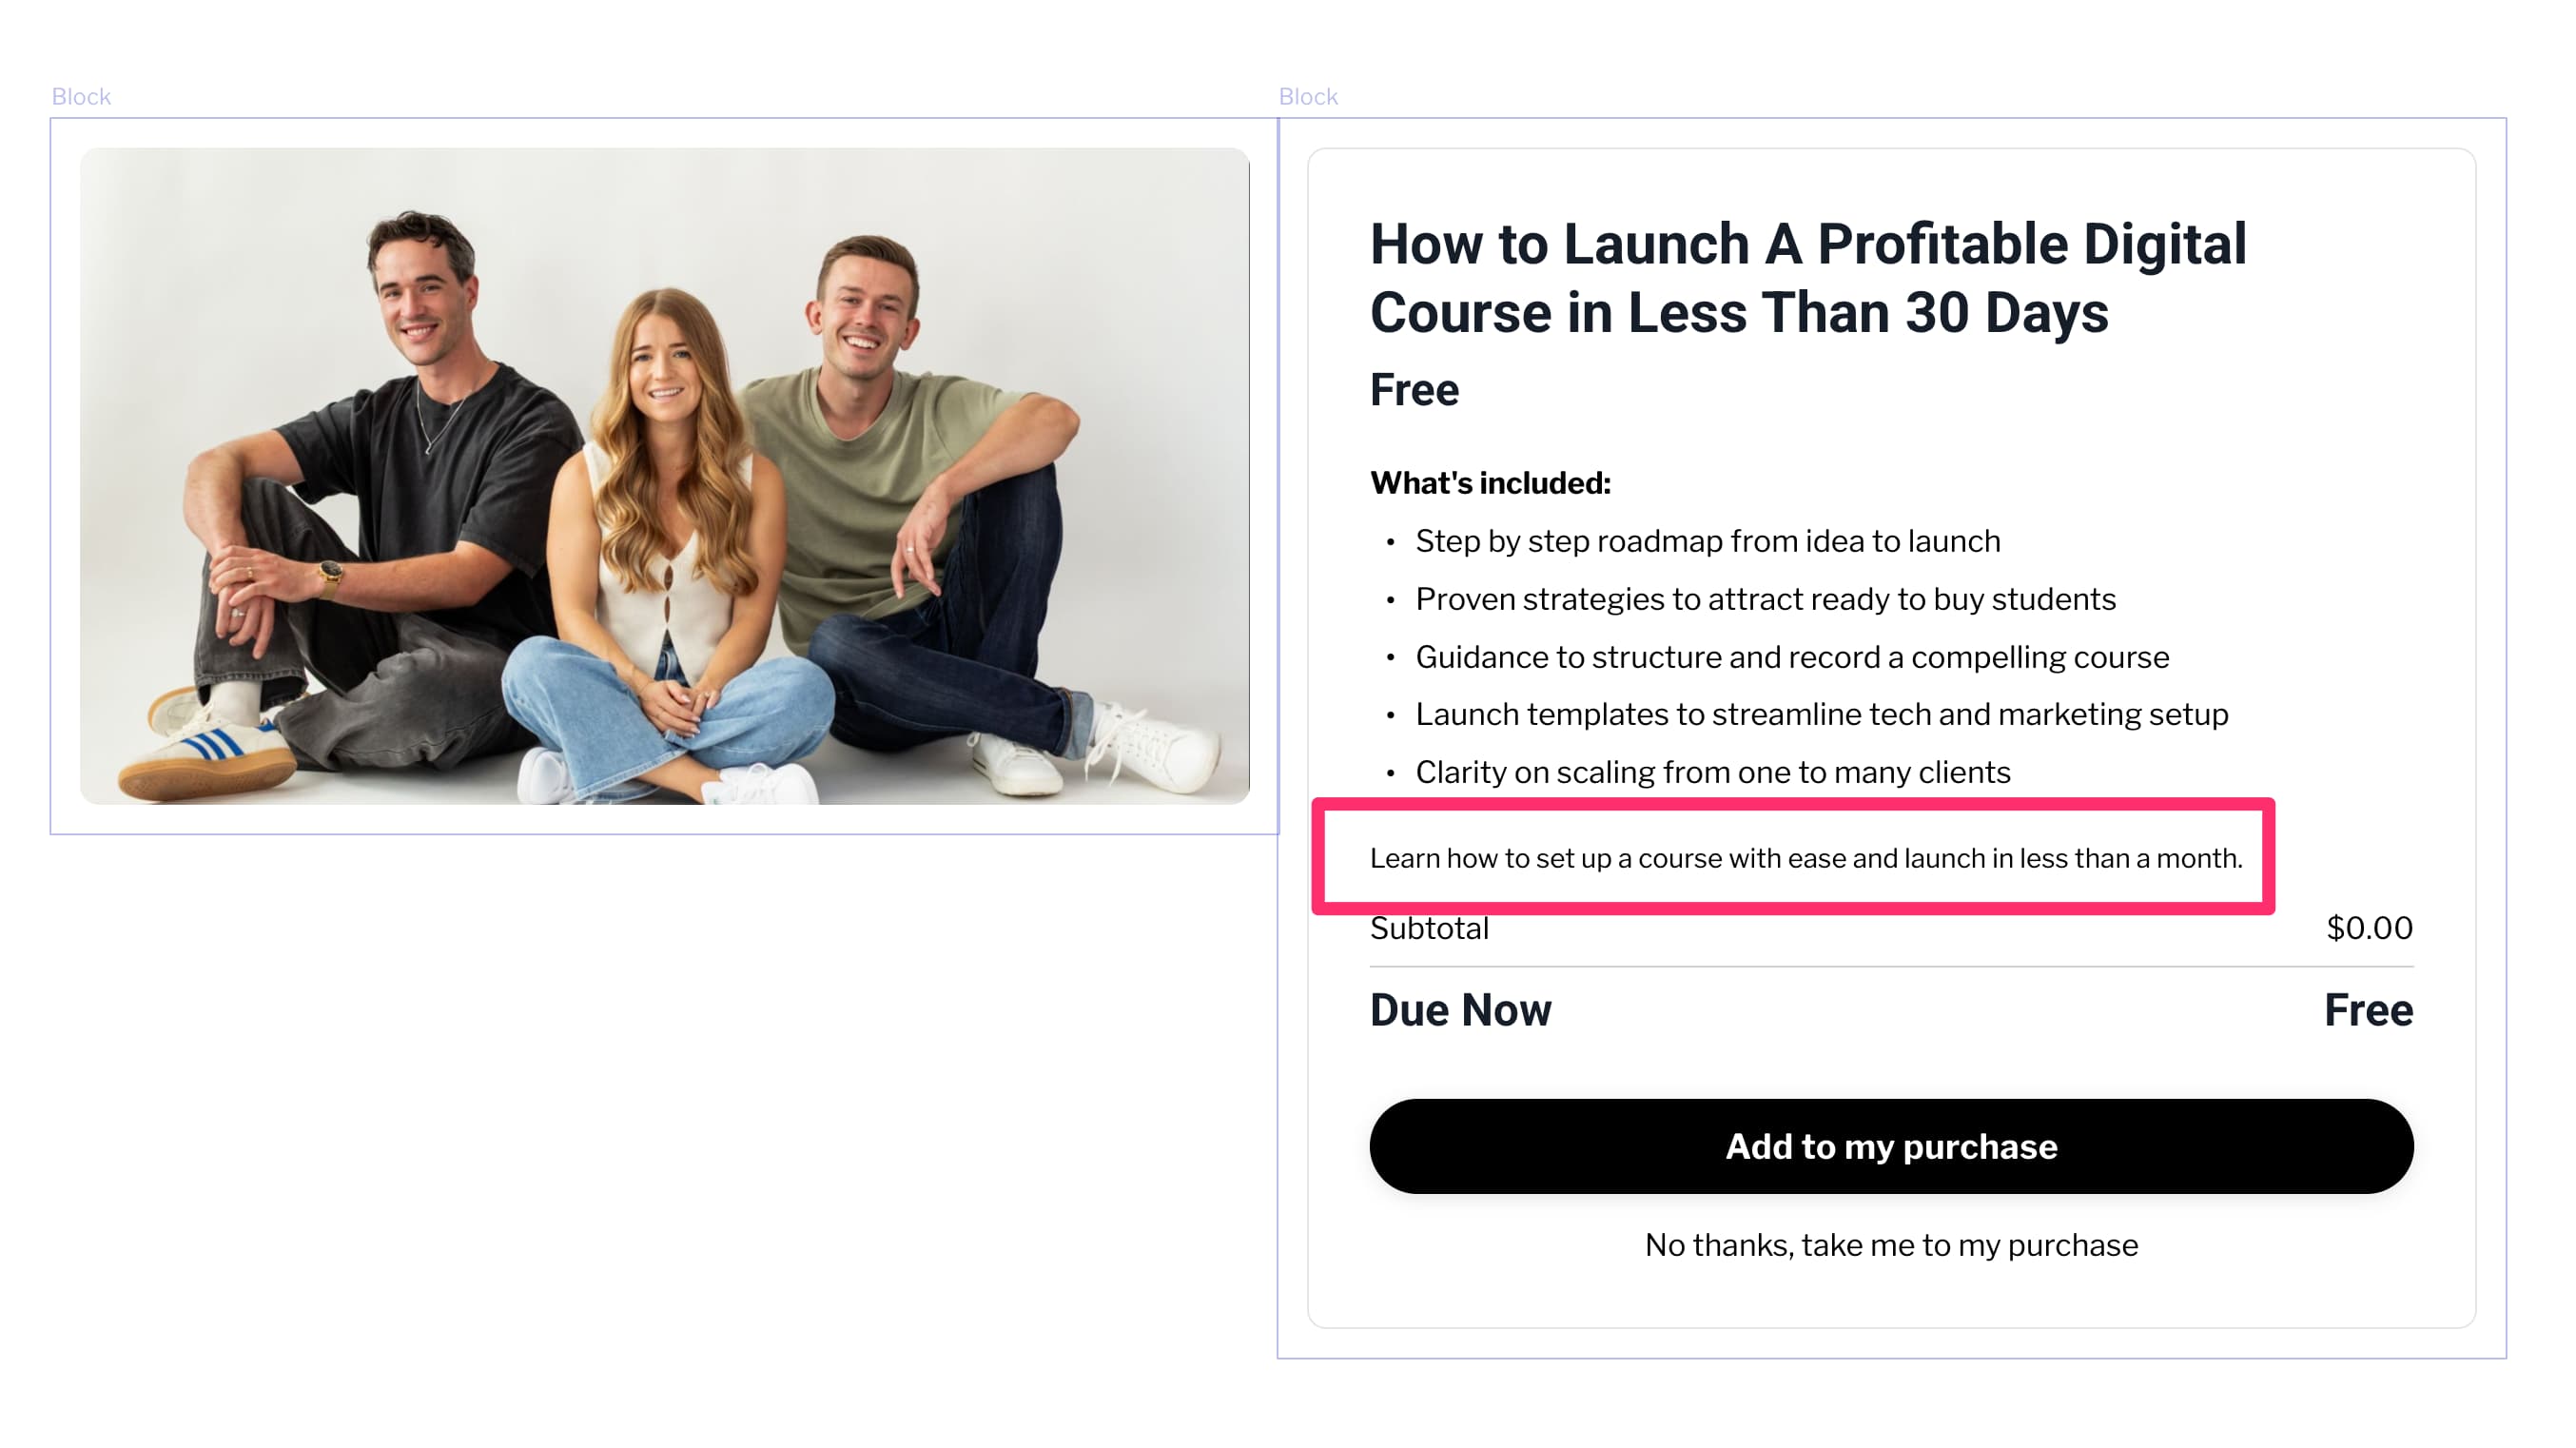
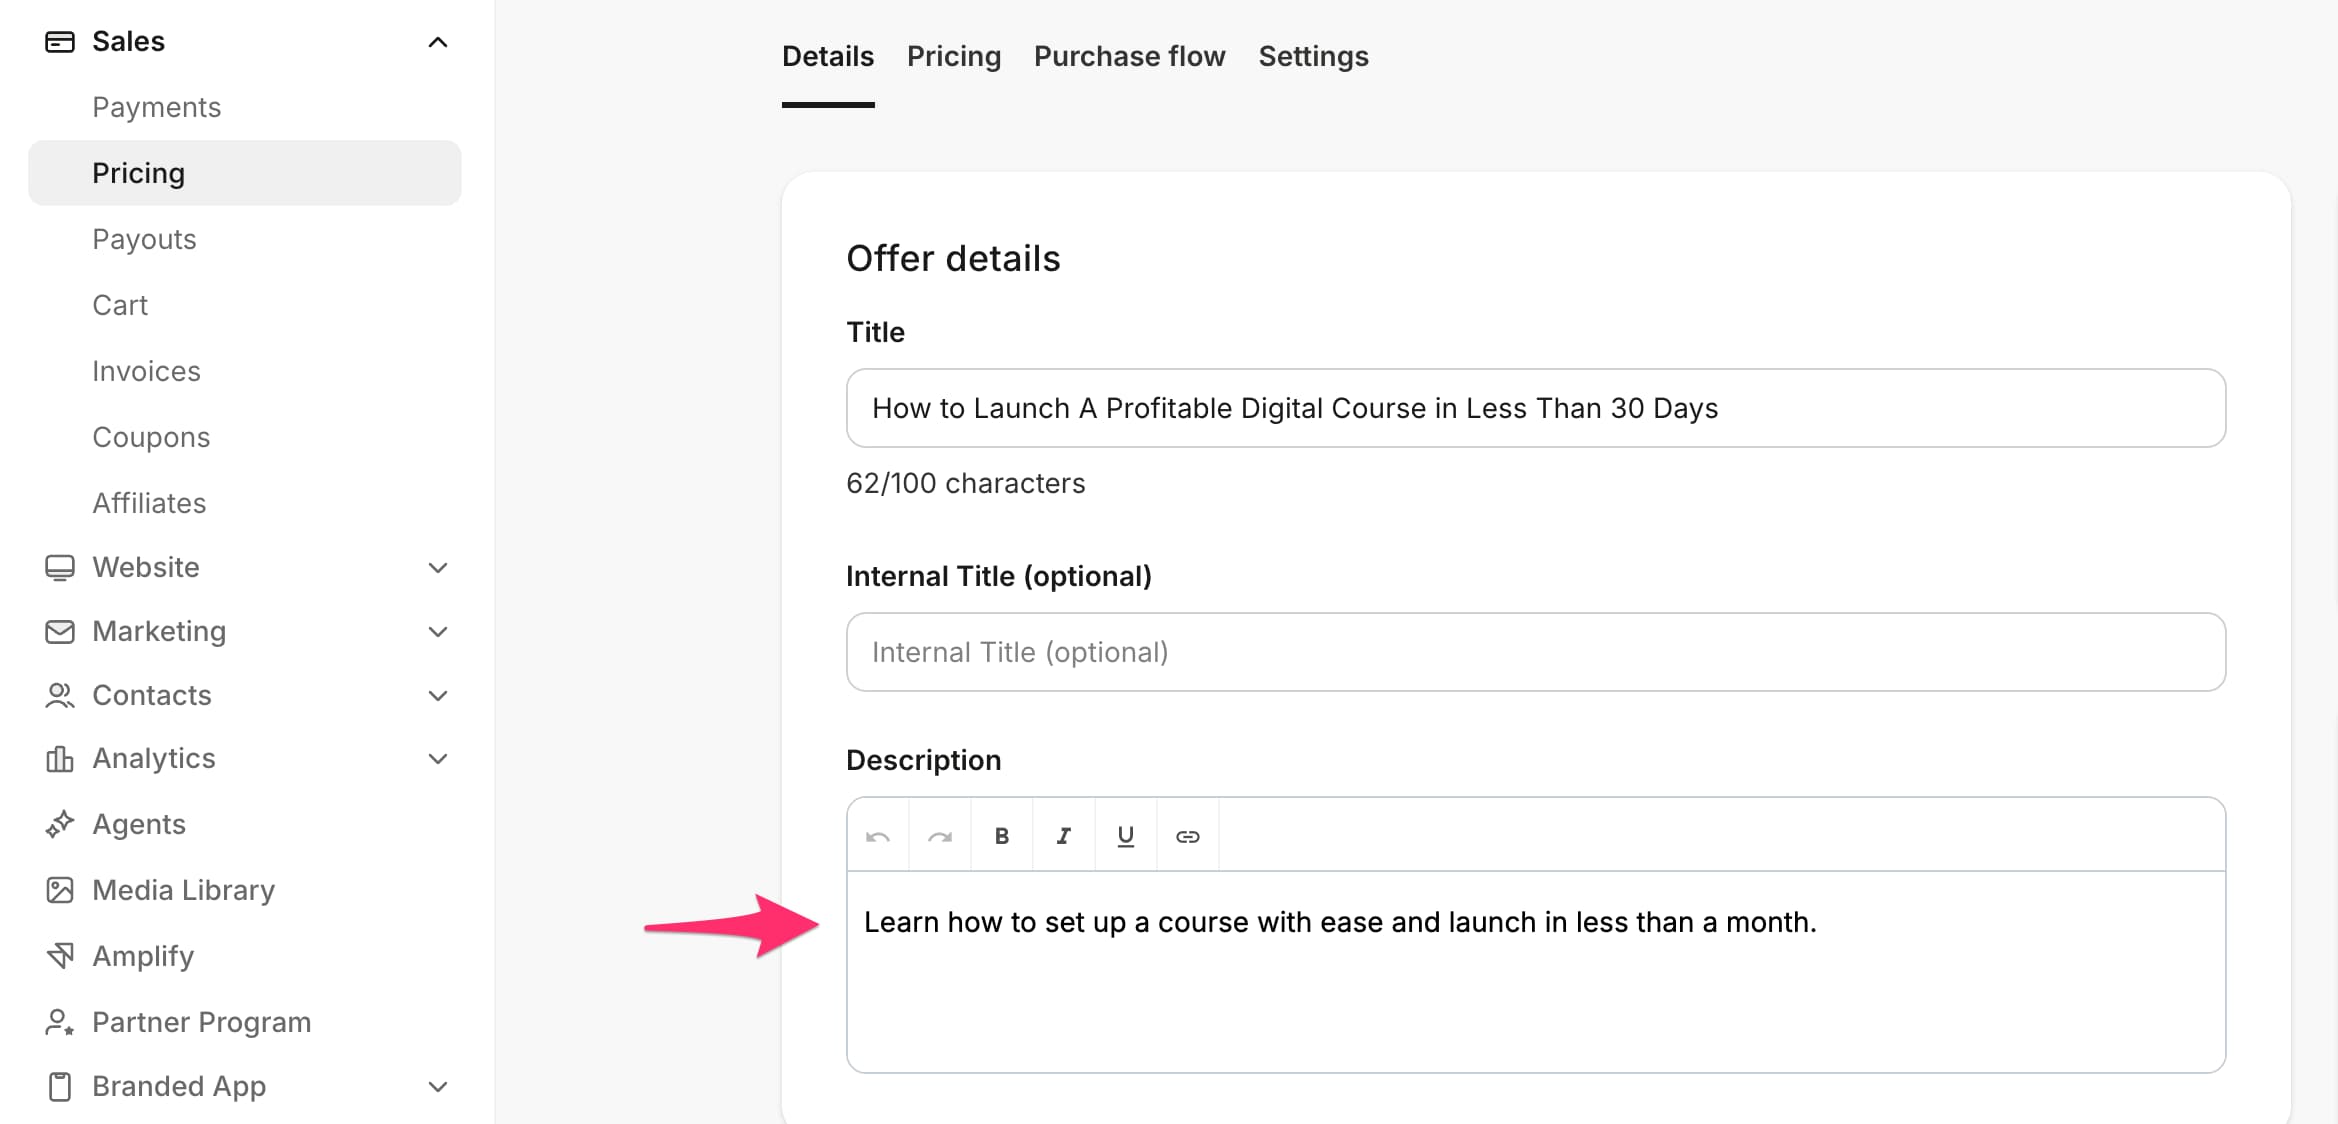
Note: If you have a description added in your Offer, it will also display under the body text in the Upsell editor.
- From the Dashboard, click Sales, then click Pricing.
- Select your Offer.
- Click Details.
Manage Upsells within an Offer
- From the Dashboard, click Sales, then click Pricing, then click Offers.
- Select the Offer you want to manage.
- Go to the Purchase Flow tab.
- Scroll to Upsell Funnel.
- Add Upsells, add Downsell pages, and reorder steps using drag and drop.

View Upsell analytics
You can view performance across all your Upsells at a glance on the Upsells tab, or click into any individual Upsell to see metrics for that specific Upsell. Metrics include purchases, conversion rate, and revenue. For deeper performance data over time, see Upsell Purchases Over Time.
Note: Analytics began collecting data from the time the rebuilt system was enabled, around April 2026, and do not include historical data.