

What are Liquid Objects?
Liquid is a programming logic that tells templates what to do. Liquid Objects can be used to personalize emails based on information collected in Form Fields. Follow this step-by-step guide to create and use Liquid Objects in your Kajabi email marketing. On Kajabi, when a contact opts-in through a Form, the information they input is saved into a data store. You can use Liquid Objects to pull that information from the data store and use it to personalize your Emails. An example of a Liquid Object can be seen in the default email template and wrapped in{{ }} characters:
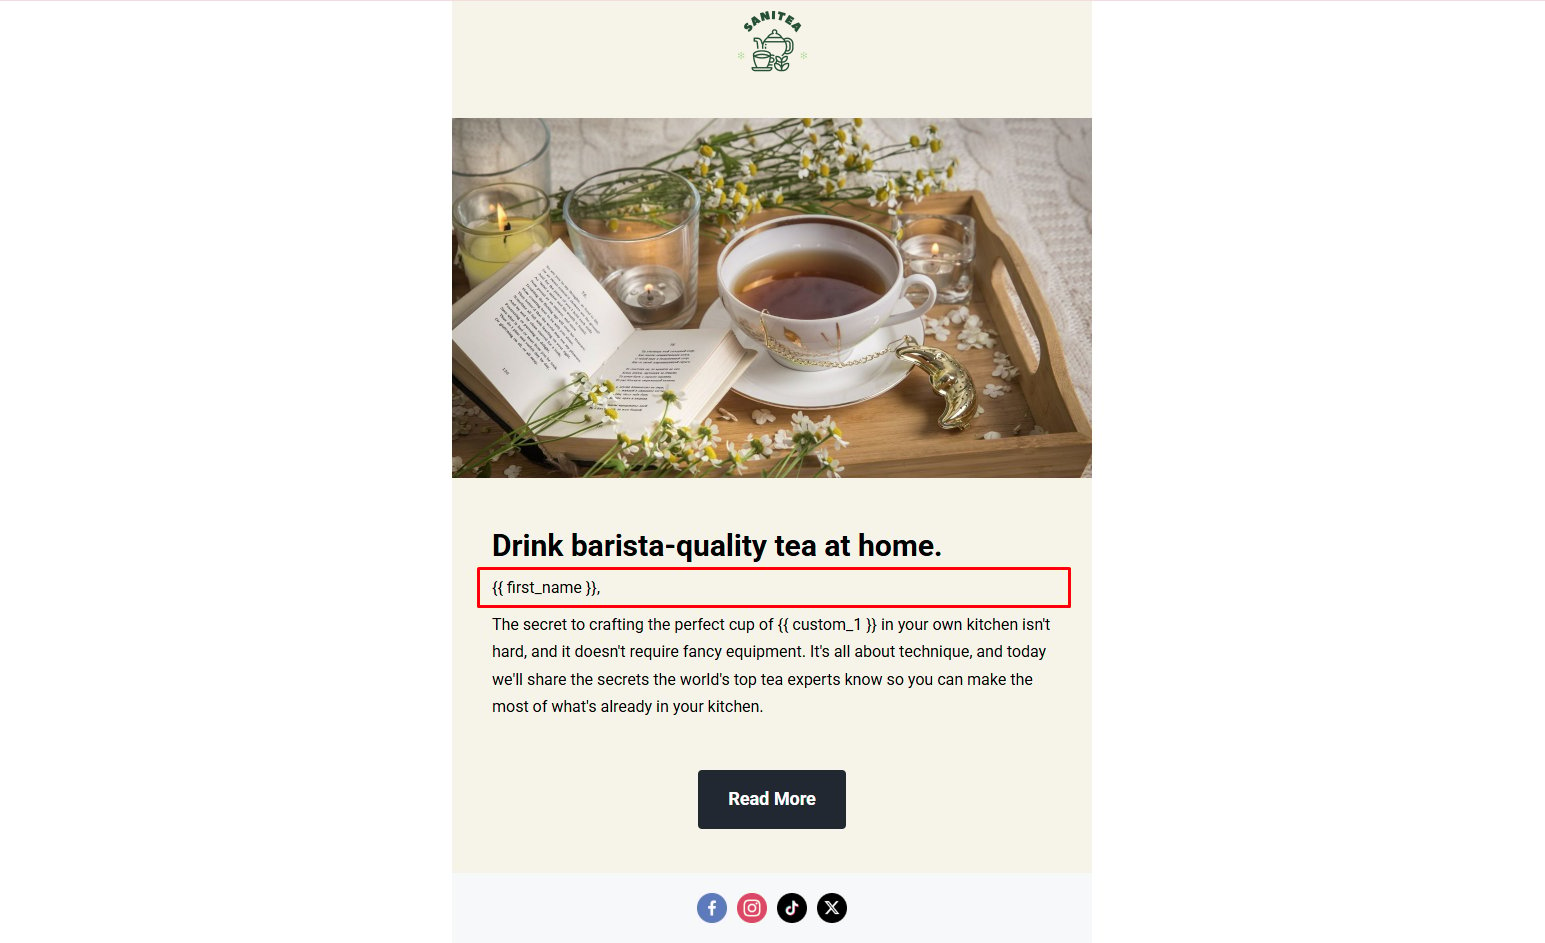
Add default Liquid Objects to an email
There are many default Liquid Objects you can use in your emails to personalize them, including but not limited to:- First Name
- Last Name
- Location
- Phone Number
Insert a default Liquid Object into an email
- From the Dashboard, click Marketing.
- Click Email Campaigns.
- Click + New Email Campaign and choose between an Email Broadcast or Email Sequence. This example uses an Email Broadcast.
- Choose an Email Template, select your recipients, and click Save & Continue.
Note: Send your email only to a segment of contacts for whom your Liquid Object data exists in the data store, so the personalization populates correctly instead of appearing blank.
- Hover over your Email Content and click Edit content to open the Visual Editor.
- Hover over the email section you want to edit and click Edit.
- In the sidebar Text Editor, locate the Personalize dropdown and choose a Liquid Object.
- Click Save to insert your Liquid Object.
Note: If you’re using the Email Classic Editor instead of the Visual Editor, after selecting your recipients you can access the “Personalize” dropdown directly on the Edit Content page in the Body text editor.
Create and input a custom Liquid Object
When you create a custom Form Field on Kajabi, that field is saved as an Object which can then be inserted into your marketing emails to increase personalization. As an example, let’s say you teach a Course on how to replace coffee with tea. In your Opt-in Form, you can create a custom Form Field asking potential students about their favorite tea. Then, in your marketing emails, you can add the Liquid Object from the custom Form Field to personalize the emails with their answer. To learn how to incorporate custom Liquid Objects into your marketing emails, follow the guide below.Create a custom form field
- From the Dashboard, click Marketing.
- Click Forms.
- Click + New Form.
- Give your form an internal title and click Save.
- Under “Form Fields”, select + Add Form Field, then Create a New Field.
- In the Title field, input the question you want to ask your page visitor. For example: “What’s your favorite tea?”
- Under Type, choose the input method your contacts will use to answer the question (such as Checkbox, Select Box, Radio Buttons).
- Click Save to keep your changes.
Add the opt-in form to a page
In order for the Liquid Object to pull information from a data store, first there needs to be data. Add the Opt-in Form to your pages and funnels: Learn how to create and build your Form
Add the Liquid Object to your marketing emails
After you’ve created your custom Form Field and added it to a Form, you can use the corresponding Liquid Object in your marketing emails.To add your custom Liquid Object to an Email Campaign:
- From the Dashboard, click Marketing.
- Click Email Campaigns.
- Select + New Email Campaign and choose between an Email Broadcast or Email Sequence. For this example, we’ll create an Email Broadcast.
- Choose an Email Template, select your recipients, and click Save and continue.
Note: Send your email only to a segment of contacts for whom your Liquid Object data exists in the data store, such as contacts who have submitted your Opt-in Form.
- Hover over your email body content and click Edit content to open the Visual Editor.
- From inside the Visual Editor, click to edit your desired Text Block.
- In the sidebar Text Body editor, locate a dropdown labeled “Personalize”. Click the dropdown to choose a Liquid Object.
- The list of supported Liquid Objects will now include the custom Form Field you created. Simply click the title of the field to insert the Object in the body of your email.
- Click Save to keep your changes.
Note: When a custom Liquid Object is placed into the Text body it will appear in the format of
{{ custom_1 }}, with the number ascending for each custom Form Field created in your site.Send
When your email is sent, your recipients will receive a personalized message based on the information they input into your Opt-In Form. In this example, a prospective student indicated in the form created above that their favorite tea is matcha. In the email created and sent, the Liquid Object was replaced by their answer (matcha):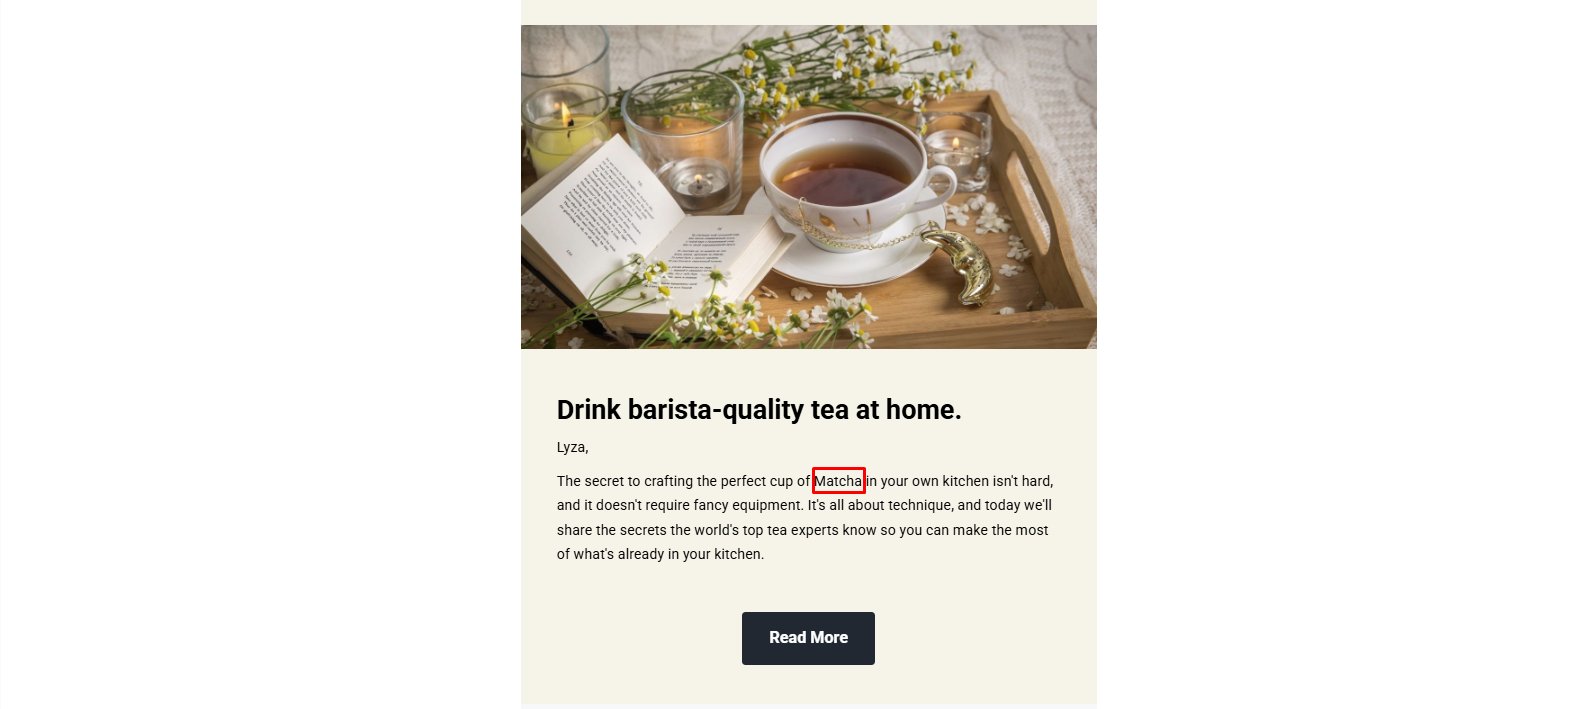
FAQs
What happens if a contact has no data for a Liquid Object?
If a contact has not submitted a value for the Form Field tied to a Liquid Object, the field displays blank in the sent email rather than showing the literal{{ }} code. Always send personalized emails to a segment of contacts who have submitted the relevant Form.